Uploading products to Shopify is not hard—but it can feel confusing the first time.
Don’t worry. You don’t need to be a developer, a designer, or a tech wizard. If you can fill out a form, you can upload products to Shopify. This guide will walk you through exactly how to add products, avoid common mistakes, and save time (and headaches).
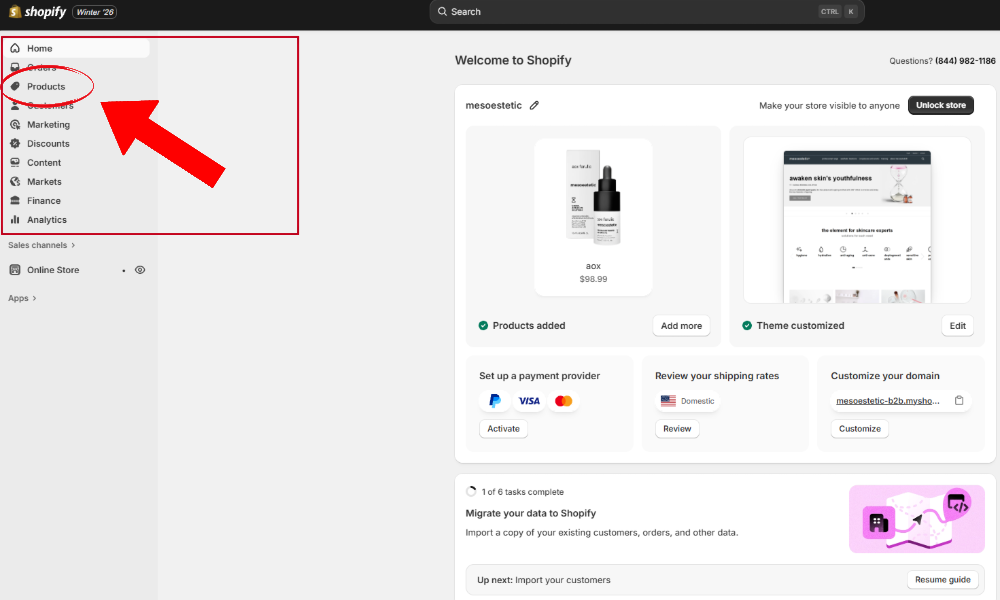
Step 1: Log in to Your Shopify Admin
First things first.
Go to shopify.com.
Log in to your store.
You’ll land in your Shopify Admin Dashboard.
From the left menu, click Products.
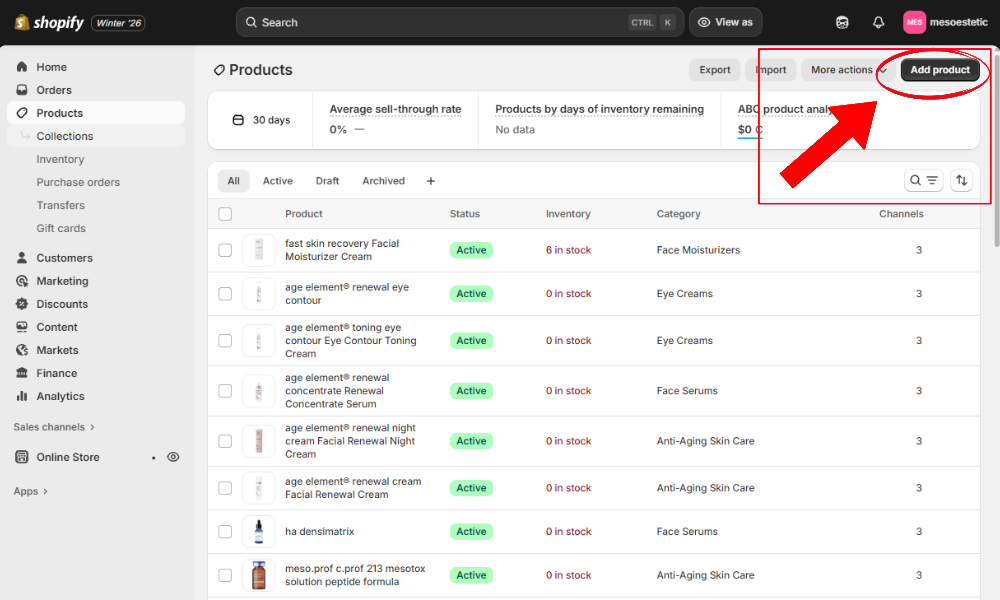
Step 2: Click "Add Product"
Once you’re in the Products section, click the Add product button (top right). This opens the product editor—this is where all the magic happens ✨.
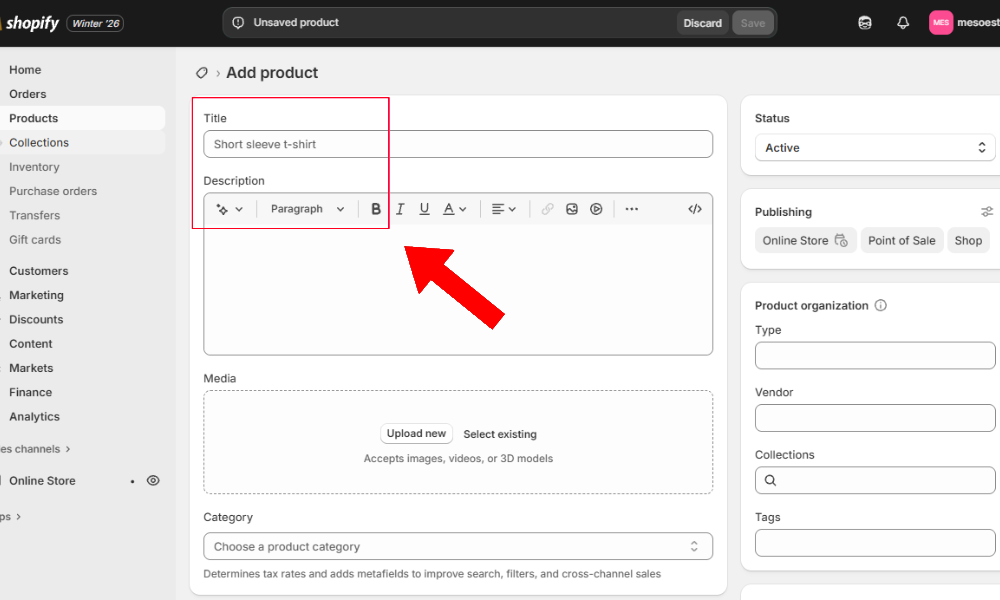
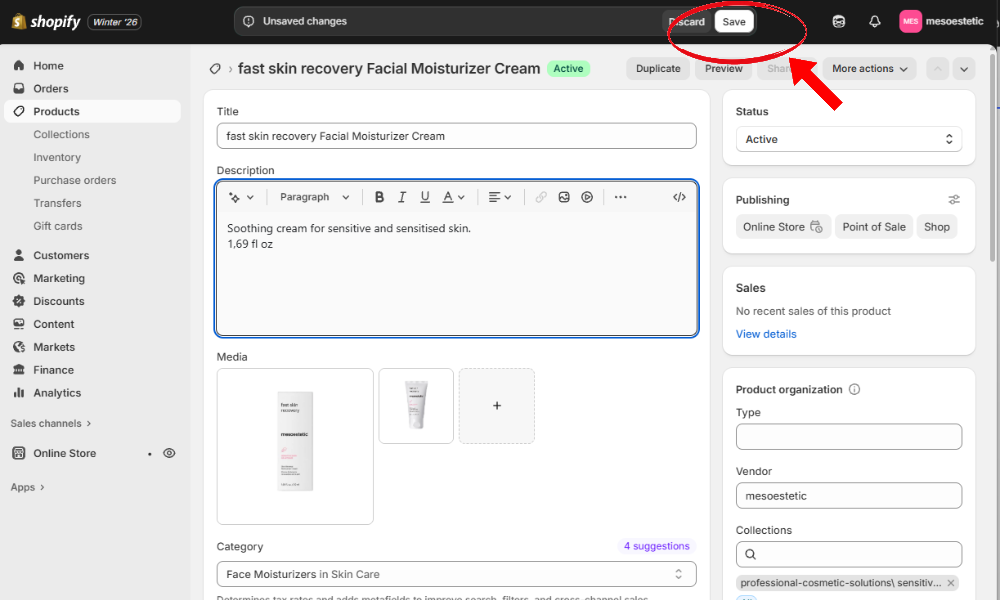
Step 3: Add the Product Title and Description
Product Title
Keep it clear, simple, and searchable.
Good example: Stainless Steel Water Bottle – 32oz
Bad example: Best Bottle Ever 2024!!!
Google (and customers) prefer clarity over hype.
Product Description
This is where you explain:
- What the product is
- Who it's for
- Why it's useful
Keep it readable. Use short paragraphs or bullet points. Pro tip: Write like you’re explaining it to a friend—not a robot.
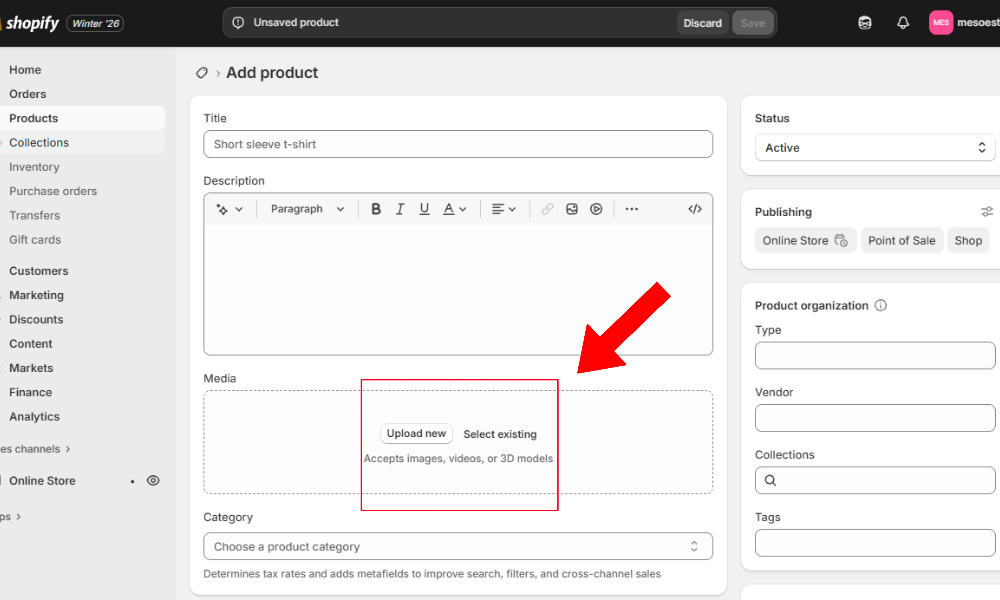
Step 4: Upload Product Images
Images sell products. Period. Click Add media and upload:
- Clear images
- White or clean backgrounds
- Multiple angles if possible
Recommended image size: 2000 × 2000 px (square works best). Avoid blurry images—your customers will notice.
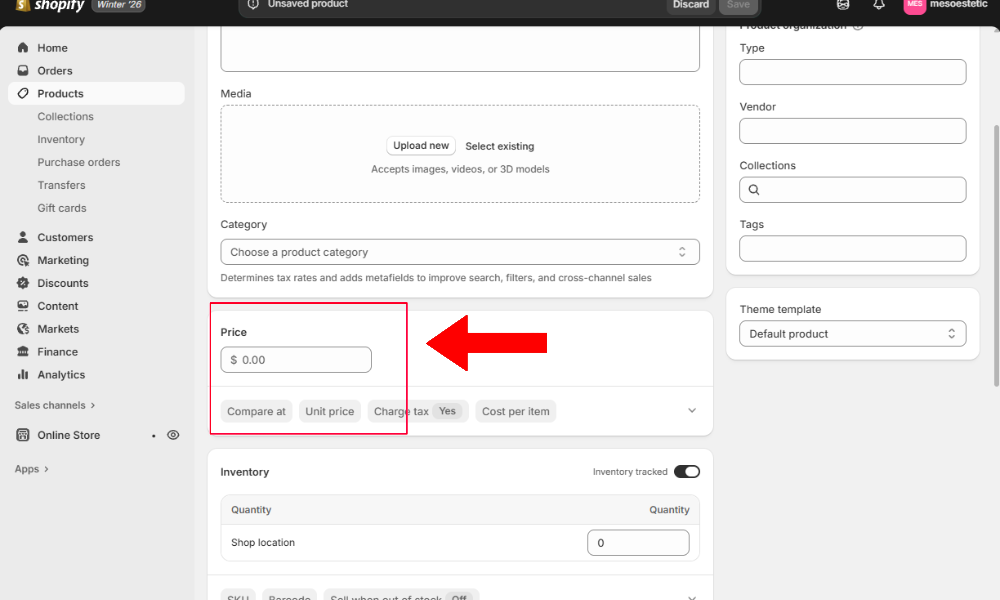
Step 5: Set the Price and Cost
Scroll down to the Pricing section. Here you'll set:
- Price: What the customer pays.
- Compare-at price (Optional): Used for sales (shows the original price crossed out).
- Cost per item (Optional): Recommended for your internal profit reports.
Simple rule: If you don’t want it discounted, leave "Compare-at price" empty.
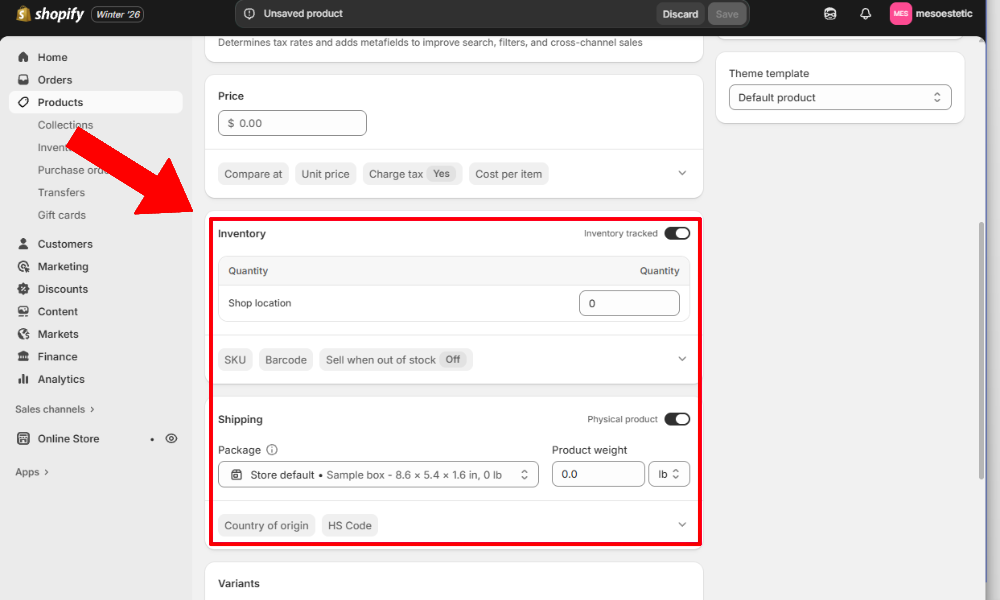
Step 6: Manage Inventory and Shipping
Inventory
If you track inventory, check Track quantity.
Enter how many items you have.
If not, you can leave it unchecked.
Shipping
Check This is a physical product if it needs shipping.
Add weight: This is crucial for calculating accurate shipping rates.
Warning: Skipping weight = wrong shipping costs later 😅.
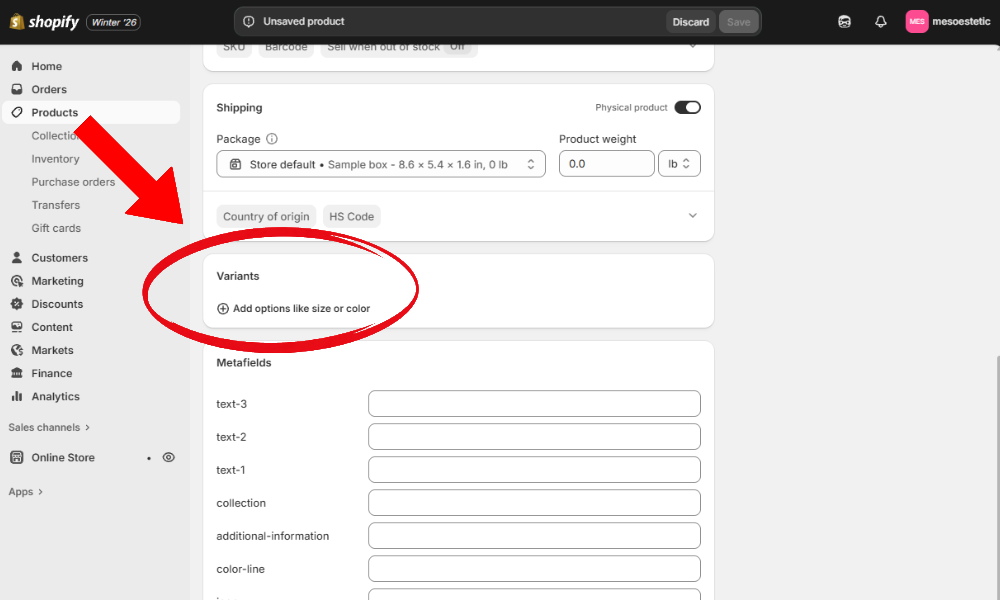
Step 7: Add Variants (Size, Color, etc.)
If your product comes in options like Size, Color, or Material, click Add options.
Example:
Option name: Size
Values: Small, Medium, Large
Shopify will automatically create variants for you. No math required.
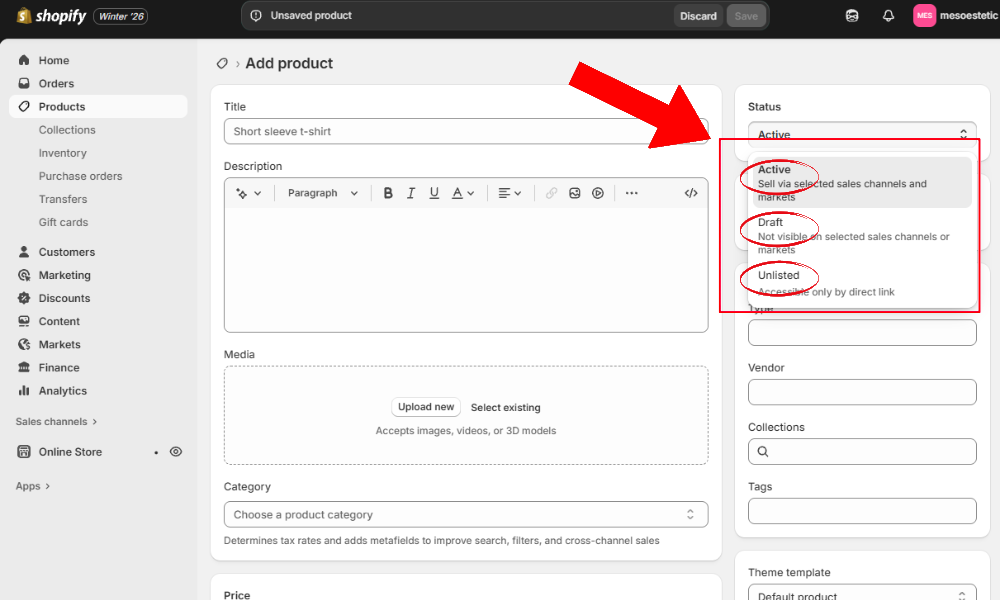
Step 8: Organize with Product Status and Collections
Product Status
Set the product to:
- Active: Live on your store.
- Draft: Not visible yet (work in progress).
- Unlisted: Hides items from storefront search, collections, and search engines, while keeping them purchasable via a direct link.
Collections
Add the product to existing collections or let automated collections handle it. This controls where your product actually appears in your store navigation.
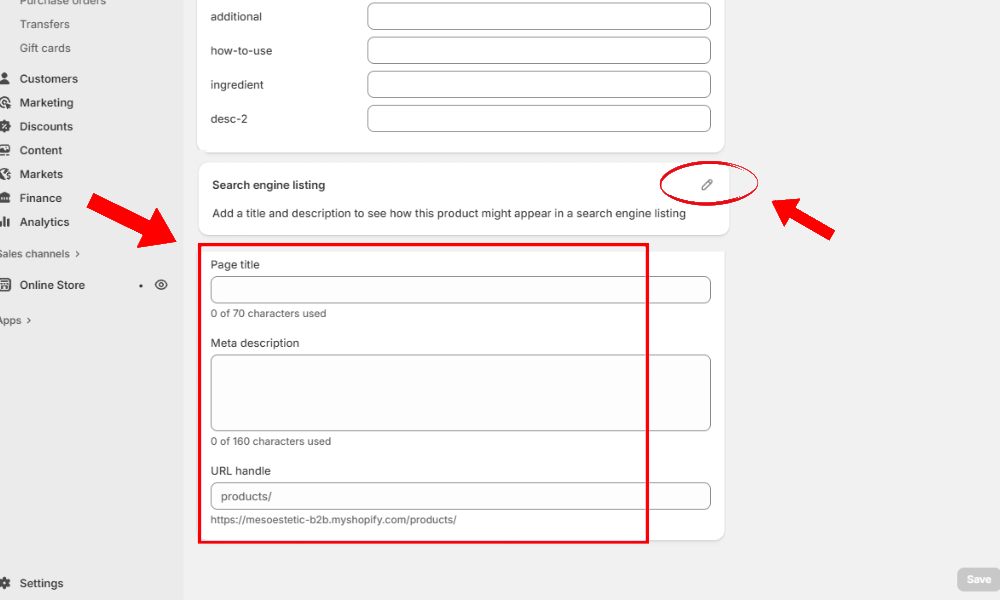
Step 9: Optimize for SEO (Very Important)
Scroll down to Search engine listing and click Edit. Fill in:
- Page title: Include keywords.
- Meta description: Make it clear + persuasive.
- URL handle: Keep it short and clean.
Example:
- Page title: Stainless Steel Water Bottle – 32oz | Your Store
- Meta description: Durable 32oz stainless steel water bottle. Perfect for gym, travel, and daily use.
This helps Google understand your product—and rank it.
Step 10: Save and Preview
Click Save (top right).
Click View to see how the product looks on your live store.
Always preview. What looks fine in the admin doesn’t always look perfect on the storefront.
Bonus: Bulk Uploading Products (CSV)
If you have many products, uploading them one by one will test your patience. Shopify allows CSV uploads so you can:
- Add hundreds or thousands of products at once.
- Edit products in Excel or Google Sheets.
- Save hours of manual work.
This is especially useful for large catalogs or migrations.
Common Mistakes to Avoid
- ❌ Forgetting product images
- ❌ Leaving products in Draft mode (and wondering why they aren't on the site)
- ❌ Skipping SEO fields
- ❌ Uploading blurry or low-quality photos
- ❌ Not setting product weight for shipping
Avoid these, and you’re already ahead of many stores.
Final Thoughts
Uploading products to Shopify is straightforward once you understand the flow. After a few products, it becomes second nature.
And if you’re dealing with large product catalogs, complex variants, CSV imports, or custom product setups—that’s where having an expert helps (and saves time).